• Skip to main content
  • Skip to footer

Redi-Footing

Easy Deck and Shed Footings

  • Home
  • Our Footings
  • Specs & Instructions
  • Order Now
  • Articles
  • FAQ’s
  • Contact Us

RediFooting

Apr 23 2020

Keys to Building a Safer Deck – Part 1

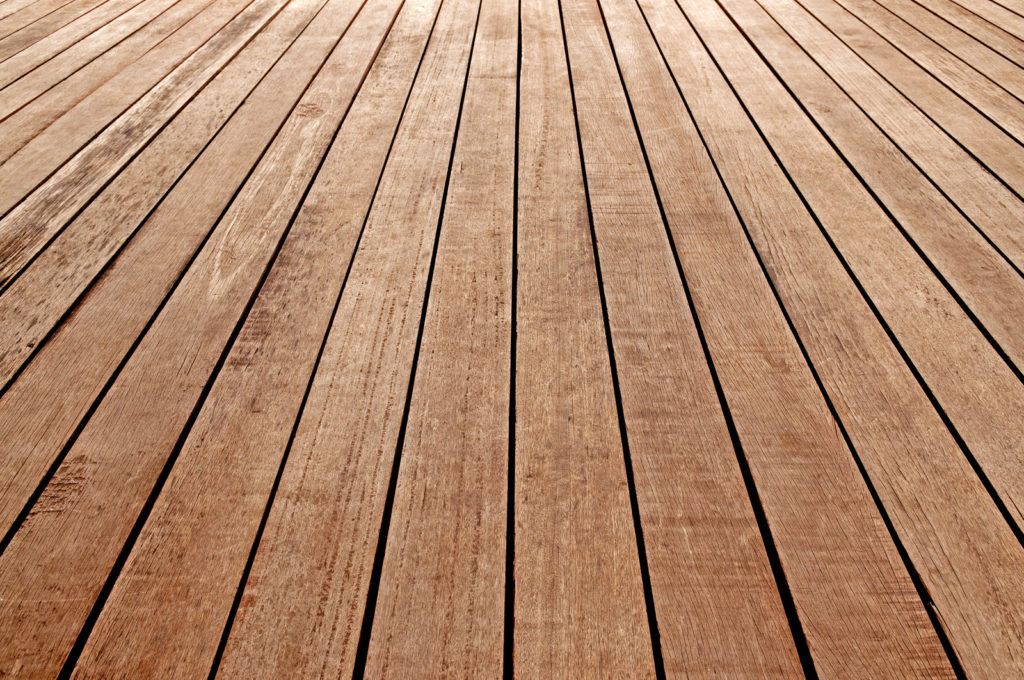
When built the right way, a deck should last at least fifteen years before requiring repair or updates. Of course, this depends on the materials you’ve chosen to use to build your deck. And that’s why it’s so important to understand each product you use in your deck’s construction, from the wood or composite decking to the railings, footings, and fasteners.

However, when your deck is NOT built right because someone has cut corners or there’s a lack of knowledge, you will not only have a deck with a limited lifespan, but you (or your contractor) will be putting yourself, your family, and guests in danger.

Follow the Proper Approval Requirements in Your City or Town and Schedule a Safety Inspection

As mentioned in another article, the planning of your deck building project is just as important as the actual construction. The fact is, the building of a deck can be completed in a week or two, and sometimes less. But you should take at least that much time for the planning of the construction. 

The planning should include not only researching the building codes and understanding what is required to build your deck the right way, but also utilizing the knowledge and expertise of your local building inspector.

Your local building department is responsible for the regulation and communication of deck building requirements, from the soil at the bottom of your footing to the width of your railings.

You should always submit your deck plans as accurately and with as much information as possible. This will allow your building inspector to provide feedback on your initial plans before a single footing is set, ensuring you are building to safety codes before the building process has begun.

If, by chance, your deck is not planned to code, you will receive instruction on what changes need to be made.

Once your plans are approved and you pay the permit fee, your inspector will either schedule site visits, or ask that you call at various phases, so the deck may be inspected. These site visits will often put your project on hold, depending on the inspectors availability, but are critical to ensuring your deck is built the right way from the start.

Don’t Cut Corners

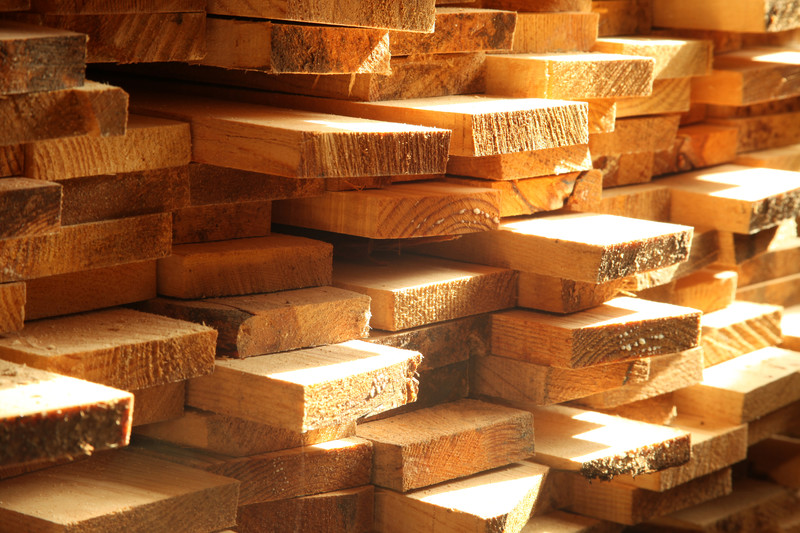
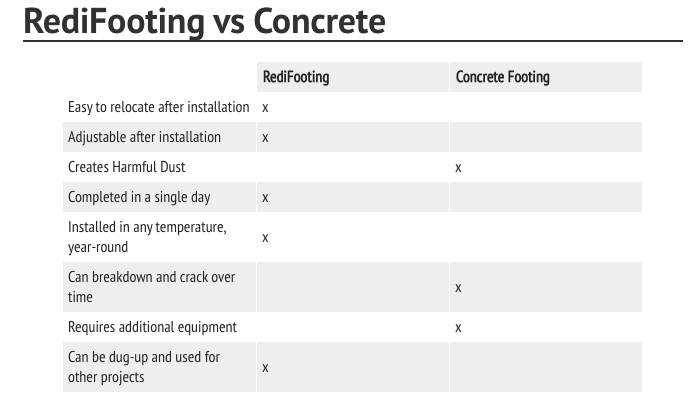
Often, especially when a deck is being built on a budget, corners are often cut to not only save time, but to save money. When you start to add up the costs of all the required materials and it appears it’s going to cost more than expected, a do-it-yourselfer may look for ways to cut costs. This can include using less fasteners or brackets, framing with smaller pieces of lumber than is required (for example, purchasing a 2×6 joist vs a 2×8 that’s required), or not digging a footing to frost depth to save on the cost of concrete. (Note, the best way to save on the costs and labor is to use RediFooting deck footings, of course!)

Cutting corners to save time and money might seem like a good idea in the short term, but by doing so, you’ll be cutting the lifespan of your deck, and increasing the likelihood of a dangerous accident that can harm you and others using your deck.

Set Footings Below the Frost Line

The frost line in the depth at which the soil freezes in the ground. When footings aren’t set deep enough, especially in certain soils simply don’t drain well, they are susceptible to frost heave, running the risk of the footing being pushed up from the ground, increasing the risk of structural damage to a deck.

That’s why it’s essential the hole for a footing is dug below the frost line, so the bottom of a footing rests on soil that never freezes and helps avoid the problems that can occur when the frozen soil pushes up the footing.

Soil with excessive clay content tends to be more susceptible to frost heave, whereas more sandy, well-drained soils aren’t as prone to freezing to a point where the soil expands.

This is why it’s critical that holes for deck footings extend below the frost line. 

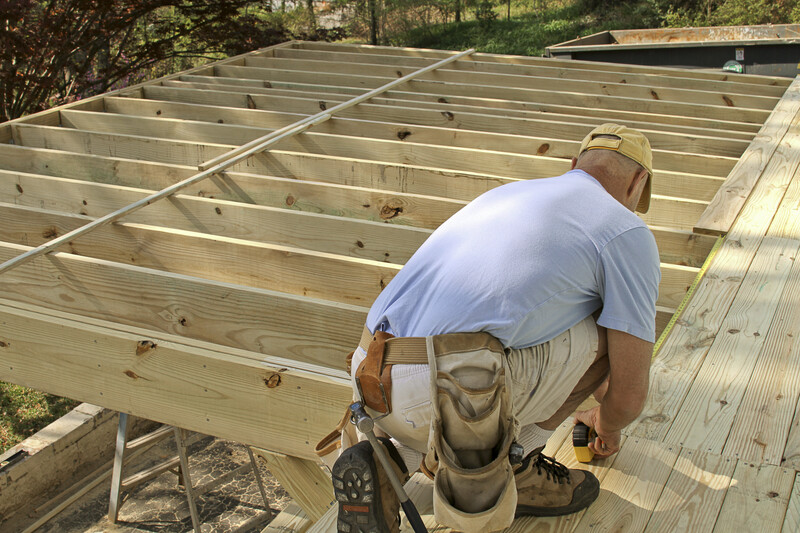
Choose Proper Fasteners

One of the more common issues with poorly built decks is the use of nails instead of screws. Of course, the ease of hammering nails into wood compared to the often tedious labor involved in driving hundreds of screws is obvious. But that doesn’t make it the right choice.

You would think nails would be fine for framing or when attaching deck boards. Afterall, nails are used in house framing, and have been used for hundreds of years.

But the fact is, the framing of a house is not exposed to water and moisture. (At least it’s not supposed to be.) A deck, on the other hand, is exposed to all elements of weather 24 hours a day, 365 days a year. That means the wood swells and shrinks, changing form from day-to-day, and from season to season. As these changes to the wood occur, the nails loosens and water is allowed into the holes. This causes the overall structure of the deck to weaken.

The fact is, nails are an inferior fastener compared to other available options, including screws that “bite” into the wood to create an everlasting hold.

But even if you choose to use screws over nails, keep in mind that all screws are not created equal. That’s why you’ll find so many options when it comes to buying fasteners. When building with today’s pressure treated lumber, the copper content in the wood can quickly corrode metals used to manufacture some available fasteners that at one time could be depended on to be corrosion-resistant. 

It’s important to only use fasteners proven effective against corrosion. Using the wrong fastener for your deck building project can cause safety issues over time.

Written by · Categorized: deck building, deck planning, Deck safety, fasteners

Apr 04 2020

Should You Use Composite Decking When You Build Your Deck?

Decking made from alternative materials such as composite lumber and PVC has been a large part of the deck building market for many decades, with composites being constantly improved to a point where composite are well worth considering for any deck building project.

In addition to the various styles and colors available, composite decking offers warranties in some cases going beyond even twenty-to-thirty years, or even for the life of your home. Although the cost of composite decking materials typically cost more upfront than your standard PT lumber, a warranty that gives you carefree ownership for as long as you live in your home will often make a lot of sense in the long run, even when the initial investment may be a little higher.

Composite decking often utilizes post-consumer waste in the manufacturing process, utilizing a blend of recycled materials and wood-pulp fibers. The plastic material used is what makes composites both rot and insect resistant without harsh chemicals and treatments often required to make wood products equally rot and insect resistant.

When composites were first introduced to the professional and DIY building market, the options were limited and, frankly, not very appealing. And without a proven track record outside of the manufacturer’s promises, there was no way to know, first-hand, of how long composites could actually last without taking the company’s word for it.

But after many decades in the marketplace, many composite decking materials have proven to be long-lasting and, in many cases, better alternatives to wood decking.

Some of the pros of using composite decking include the ease of which they can be installed. Cutting and drilling is often easier, and many now come with their own installation and fastening kits to simplify installation even further. Plus, there is rarely (if ever) any finishing, sanding, or staining required.

Composite decking is undoubtedly a low-maintenance option. 

Popular composite decking manufacturers

TREX® https://www.trex.com/

As one of the leaders and original manufacturers in composite deck and building materials, Trex® was actually formed as a company through the buyout of a division within the Mobil Corporation back in 1996.

According to their website, they were the first company to use recycled plastics, such as bags, combined with scrap wood. TREX® created the first generation of composite decking. Today, TREX® decking is made with ninety-five percent recycled materials. (And they claim on their website that since they started the company, they have not cut down a single tree.)

In 2010 TREX® released their TRANSCEND® line of composite building materials with a twenty-five year guarantee against both fading and staining. And since 2010, TREX® has released numerous lines of building options, including materials for railings, pergola construction, outdoor lighting, and even recently introduced steel framing that will never rot, sag, or warp like wood.

TimberTech® (An AZEK® company) https://www.timbertech.com/

Timbertech® is AZEK’s® composite decking line of composite building materials and, like TREX, one of the original manufacturers of composite decking.

TimberTech® deck boards are manufactured to mimic the natural color, grain, and shape of real wood using environmentally-friendly engineering.

By capping the composite decking with polymer material, these protective caps wrap around the composite material to not only allow an exceptional wood-look, but provides thorough protection from mold, mildew, and moisture to avoid damage that occurs with real wood.

According to the TimberTech® website, their decking products utilize a range of 54-80% recycled materials (depending on the specific product line). They claim to have diverted roughly 290 million pounds of waste and scrap from ending up in landfills in 2019. 

CALI Bamboo BamDeck® https://www.calibamboo.com/composite-decking.html

Cali Bamboo™ is a direct-to-consumer flooring and decking company that manufactures two different decking products.

BamDeck® is their original decking product made of 60% recycled bamboo fibers and 40% recycled High-density polyethylene plastic. 

And because bamboo is an extremely durable building material, it’s the bamboo fibers used in the composite that provides the strength and density to make BamDeck decking stronger.

According to the Cali Bamboo™ website, third-party tests in accordance with ASTM (formerly known as American Society for Testing and Materials) regulations have found BamDeck® to be at least 3.6 times as strong as other composites made from plastic deck material.

BamDeck 4G® (their latest line as of 2020) is manufactured to have a more modern, matte finish and comes in both wide & standard widths.

TruOrganics® Composite Decking

TruOrganics® Composite Decking is manufactured with rich colors and authentic hardwood texturing. What the company describes as a “next generation composition and 3G core” that is strong and resilient. The composite is wrapped on all four sides (many composites leave the bottom exposed) with distinct rays and knots while guarding against stains, scratches, snow, and sun damage. 

The composite decking is geared toward the DIY homeowner, with a simple-to-install, secure fastener system hidden underneath the decking during installation.

TruOrganics® is made of one-hundred-percent recycled materials (60% recycled wood fibers, and 40% high density plastics).

There are dozens of other composite and non-wood decking manufacturers out there, and it’s worth exploring your options when deciding what materials to use to build your deck. You should consider the costs, durability, style, and colors available in addition to the installation, sustainability, and available warranty when considering all of your options. 

Written by · Categorized: deck building, deck building material, deck planning, Uncategorized

Mar 23 2020

Three Tips for Building a Better Deck

(c) Can Stock Photo / kittichai

Building a deck can be a lot of fun and, when compared to other home improvement projects, is relatively easy to accomplish with a little research to improve your overall building skills.

But as someone who has been involved in deck building for over twenty-five years, there are certain things homeowners and contractors do that improve the entire process overall. These steps not only make building easier, but will give you peace of mind knowing your deck will last a long time.

Tip Number One: Give Yourself Enough time to Thoroughly Research Materials

When it comes to the materials you can use to build your deck, the options are, for the most part, limitless. On one end, you have real wood such as pressure treated lumber and cedar. On the other you have man-made materials such as composites and PVC and more man-mades coming on the market all the time.

The difference in all the available materials is not only the wide range of costs and how the deck will look once it’s complete, but also in how it’s built. For example, the number of joists needed for exotic hardwoods vs a flexible composite piece of decking can vary. That means, in some cases, certain composites may require additional lumber built into the frame.

Different woods may also require different protective treatments, and some may need to be treated more often than others. Composites and PVC decking often require less maintenance, but the cost of the actual materials plus the hardware required for installation can significantly increase the cost of your deck, overall.

That’s why it’s important to narrow down your options as much as possible during the planning stage and have a good understanding of the pros and cons of each material option you’re considering.

Tip Number Two: Take the Steps Up Front to Prevent Water Damage Later

One of the keys to preventing water damage to your deck or house is to use proper spacing to ensure water will not become trapped between two or more pieces of wood. Using proper spacing between your deck boards, your ledger and the material (on your house) you’re attaching it to, and your deck posts is critical to preventing future water damage. Water will always find a way to escape, whether it evaporates or finds its way into the wood against a home. 

If you are indeed attaching your deck to the ledger board on your house, without both flashing and proper spacing between your deck and the ledger board you’ll attach to your house, the water will become trapped. And once it becomes trapped, the only way water will find its way out will be through the house, eventually rotting the wood and weakening the construction of your deck and your home.

There are different types of flashing for different applications. Spacing devices can be purchased, or you can make them yourself from a material that will not rot or decay (PVC, for example).

No matter what you decide, spacing and flashing are critical to preventing water damage.

The same case can be made for your deck posts and allowing them to come in contact with a concrete footing. There must be enough space to prevent water from being trapped between the wood and your footing, especially if you use concrete, which can often hold water that can eventually weaken both the post and the footing. Of course, we recommend you skip the concrete entirely and use RediFooting deck footings, high-strength plastic footings that are actually stronger than concrete.

Tip Number Three: Use (or Make) a Jig for Proper Spacing When You’re Building Your Deck

Spacing on your deck is critical. From the joists to the decking to the railings, keeping your spacing consistent every time will make a big difference not only on the quality of your construction, but to the way your deck looks once it’s complete.

Most of the measurements used on a deck will seem repetitive. That’s why a good tip is to either purchase or make your own spacers or jigs for everything from baluster spacing to decks and even for aligning the joists you’ll install (typically) sixteen inches on-center.

Some of the spacing is more important than others. Once example of this is the space you leave between your decking boards. Because when installing decking, you need to ensure there’s enough space for water to drain from the top of the deck. If the board are too tight, water will sit on the deck and try to find it’s way into your deck or home. But you also don’t want to leave too much space between the decking boards. Because if your spacing is too wide, chair legs and even the thin point of a high heel could get stuck and cause a fall, especially over time as boards shrink and spacing tends to open up. That’s where a deck spacing jig like this one for around $7 on Amazon comes in handy.

A decking spacer is recommended, which can be purchased or you can make one yourself by simply cutting a wedge out of scrap lumber. In fact most of the spacers and jigs you’ll want to use to build your deck can be made out of scrap wood.

These three tips are just a few of the simple basics that can make a big difference as you’re building your deck and for the generations ahead you’ll expect to enjoy your construction project.

Written by · Categorized: deck building, deck building material, deck planning

Mar 16 2020

Deck Materials You’ll Need to Build Your Deck…from the Bottom Up

(c) Can Stock Photo / SafakOguz

When you first start planning to build your deck, you’ll quickly realize there are many options when it comes to figuring out what materials to use. From the footings to the lumber to the fasteners and screws, getting a grip on your materials is a first-step to building a safe deck you’ll enjoy.

Footings

When it comes to footings for your deck, we of course know that in most cases there will be no better or easier option for you than to use RediFootings for your footings. There is no concrete to buy, no mixing, and no waiting for the concrete to dry. You can read more about why RediFooting is your best option for your deck footings here.

Below is a graph that shows the difference between using RediFooting vs using concrete for your footings:

In combination with the ledger attached to the house, the footings support the entire load of your deck. Footings are one of the most critical components of deck construction (as is the soil below the deck footing). But if your footing can’t support the load, it doesn’t matter what materials you use to build the rest of your deck. 

The Framing and Structure of Your Deck

For the most part, the main framed structure of your deck–which generally includes the beams, posts, joists, and ledger if attached to a house—will be built from pressure treated lumber. It’s not only the most economical choice but is rot and insect resistant. It’s also easy to find throughout the United States.

An alternative to pressure treated lumber is to use either redwood or cedar, both rot and wood-insect resistant. However, the costs can be double, on average, for redwood or cedar as compared to building your deck with pressure treated lumber.

Initially, pressure treated lumber was preserved with chromate copper arsenate (CCA) added to the wood to make it wood and insect resistant. But because of its high arsenic toxicity levels causing both health and environmental concerns, the manufacturing of pressure treated lumber using CCA was discontinued in 2003. 

The newer pressure treated woods (ACQ) are generally more environmentally-friendly with copper-based compounds, also making them a healthier alternative to the older, discontinued pressure treated woods. 

However, the newer pressure treated lumber is not without its issues. There are still warnings, including the recommendation to wear gloves during handling and to wear an EPA approved dust-mask. 

Additionally, the new pressure treated woods treated with copper are more expensive and also cause issues with the corrosion of certain metals (due to the high copper content). More information is included below with regards to the different types of hardware required for use with pressure treated woods to avoid the dangers of metal corrosion.

Wood Decking

Even if you decide to frame your deck’s structure using pressure treated wood, your options are still wide open when it comes to the actual decking material you can choose to use for the parts of your deck that are visible to you and your guests.

The most popular wood decking options are pressure treated wood, redwood, or cedar. The difference (aside from cost) is that redwood or cedar is naturally rot and insect resistant.

In addition to cedar and pressure-treated decking, there are beautiful hardwood options, also known as “ironwoods” because of their dense cell structure. Because these hardwoods are so dense, they require additional handling and extra work to use them in your construction project. For example, most of the hardwoods will need to be pre-drilled and require different hardware than your typical softwood materials. You’ll notice your saw blade will wear faster when cutting hardwoods.

Hardwoods include Ipe (the most popular hardwood), Cumaru, Garapa, Cambara and Machiche. Although they do not necessarily have to be treated the way the softer woods should, you will extend the life of your hardwood decking by using a surface treatment.

Non-Wood Decking

Both composite decking and PVC decking has taken off over the past few decades, and provides homeowners with a viable alternative to building a deck with real wood.

Composite decking is typically manufactured with a mix of recycled plastic materials and wood pulp. By adding the plastic to the composite, it becomes insect and rot-resistant. Because it is a manufactured product, you will not find the imperfections you will with natural wood products. There is no grain to worry about, and no knots that can often get in the way when cutting and drilling.

Most of the products manufactured today are non-toxic, and have come a long way since the early days when you could spot a deck built with composite or plastic decking a mile away.

Today’s composites and non-wood decking products come in a wide range of colors and styles, and can be an aesthetically pleasing addition to your deck.

There are few downsides to building with composite decking. One is the cost, which is higher than softwood lumber. The other is that some composite decking is more flexible than wood, and often requires closer support spacing, which can increase the overall cost of your deck.

Fasteners, Connectors, Screws and Nails

As deck building codes have changed over the past few decades, using metal fasteners has become more a part of building than your grandfather might ever imagine. Back thirty or forty years ago, a contractor might have used some joist hangers here and there, but otherwise entire decks built with screws, nails, and bolts.

Today, the building codes are written so it is very clear which specific metals and fastener types must be used to build a safer, code-compliant deck. Using the correct fasteners will prevent dangerous failures and provide you with a stronger deck.

Prior to purchasing your connectors and fasteners, you will need to make sure you are choosing the right metal for the material you are using to build your deck. The options used to be limited to either galvanized or stainless steel, but today different woods, such as pressure treated, require coatings and metals specifically designed for the makeup of the wood. The connectors and fasteners are labeled to help you identify which metals you will need.

You can find a wealth of information about fasteners and connectors available for deck construction by visiting the Simpson Strong-Ties website.

Deck Screws

When you walk down the aisle at the hardware store or big box store, you’ll realize there are hundreds of variations, sizes, and materials used to manufacture screws.

As is the case with the fasteners and connectors, screws are manufactured with various materials and coatings to ensure durability and compatibility with the various available deck building materials.

The screws you choose will depend on the type of lumber you’re going to be using to build your deck. Therefore, it’s important to know the differences and why any one screw would be suitable for your construction project.

Galvanized screws were at one-time the go-to, especially with pressure treated lumber. But because of  the newer formulations in pressure treated woods, some screws that were at one time approved will no longer last long enough to be considered useful. Many will break-down over time due to the makeup of the pressure treated lumber.

That’s why there are so many different screw variations on the market today. 

And the differences aren’t just in the material used in the manufacturing. Whether you use galvanized or stainless or ceramic coated is just the beginning of your decision-making.

Because in addition to the material used to manufacture the screws, you will also need to consider the type of screw head you will use. Each will vary from one type of screw to the next, including everything from your typical Philips head screw to square-bit screws to star-head screws to flat-heads, and many others. 

Each screw is manufactured with the goal of improving drive, ease-of-installation, resisting corrosion, and having a durable screw that will last the life of your deck.

As you can see, there are a lot of options when it comes to finding the best building materials for your deck. This article is only a start, and it’s worth doing your own homework once you have your plan together so you can make the most informed decision so you will have a safe and attractive deck you will enjoy for a long time.

Written by · Categorized: deck building, deck building material, deck planning, fasteners, footings, wood

Mar 11 2020

How to Build a Deck: The Importance of Planning Your Building Project

(c) Can Stock Photo / JBicking

What’s great about building a deck is it’s a project you can tackle in a short amount of time with some fairly basic tools and minimal skills.

That’s not to say building a deck is easy.

And I’m not suggesting you should stop reading this article and run to the lumber yard (you do shop at the local lumber yard, don’t you?) with your credit card for a pile of lumber you’ll nail together as soon it’s delivered.

The truth is, without proper planning, a lot can go wrong. In fact, without planning ahead there’s a good chance a lot will go wrong.

That’s why I recommend you spend a few days or as much time as necessary to put a solid plan together. Because you deserve a deck that’ll not only last a long time, but will provide you with a safe addition to your home.

Keep in mind, there’s more to developing a plan than the detailed drawing you’ll provide to your local building inspector. You want to ensure your deck will be as functional for your household as possible. That means having goals and knowing why you want to build your deck in the first place.

Is it simply to extend your living space? Are you building a deck because your yard isn’t flat and difficult to enjoy? Is it to have a place outdoors where you can spend time with your friends and family? Are you building a deck so you can relax in peace by yourself?

Your deck can have many uses and can be designed to be as unique as you want it to be. Or maybe you want something simple to serve a very basic purpose, such as keeping you up and away from the dirt or grass in your yard.

The truth is, building a deck isn’t hard. If you don’t already have them, you can certainly learn the necessary skills within a short amount of time.

But planning your deck will be the key to a successful project. And the more effort you put into the initial steps, the better your deck will be…hopefully for as long as you own your home!

Finding the right design for you and your home before your build your deck

One of the first steps to your deck plan will be to determine what you want your deck to look like.

There are dozens if not hundreds of variations in deck designs, from the way you lay the decking to the style of the railings to the type of materials you use.

Knowing exactly what you want your deck to look like so it fits your home and your yard is an important step.

While you don’t necessarily need to purchase a pre-designed plan for your deck, deck plans will not only help you with the design, but will provide you with a specific list of building materials. Knowing what material you’ll need can often be one of the critical challenges when you’re first pulling everything together.

The last thing you’ll want is to have to make multiple trips or pay unexpected delivery or pickup charges because you didn’t order enough (or you ordered too much) material.

However, keep in mind most building centers–especially the local establishments–will often help you plan your deck. Many will have deck design software to figure everything out for you. Typically this is a service that’s free-of-charge, as long as you’re buying the material from the same place.

But whether or not you decide to design your own deck or buy a done-for-you plan, you need to account for everything you’d like your deck to include. This will impact the way your deck will be designed and built.

As mentioned above, knowing what you’ll be using your deck for is an important first-step. But you also need to account for features you may not need right away, but may want to add in the future. If you’re going to be cooking out on your deck (who wouldn’t?) you’ll want to think ahead and decide where you would place your grill.

You’ll also want to consider what kind of storage you may want, if any. Perhaps you’d add bench seats to your design, and include a top that lifts with storage underneath.

You may also want to think about your desire for privacy. With a deck, you will be higher off the ground and the view your neighbor has of you may be different than what you’re used to. But don’t worry, privacy can be created easily with various options, such as building a barrier with lattice and even utilizing plants or climbing vines.

Deck Safety

You will be dealing with a building inspector to get the required building permit. Even if it may seem like an additional step that will add more time to your project (in addition to paying the fee for the actual permit, do not skip this step in the process. Involving the building inspector and obtaining a permit ensures your deck is built to code and is structurally sound.

Deck safety should not be ignored. Although there are no specific statistics presently available, the Consumer Product Safety Commission found that over 20,000 people were injured by the structural failure of a deck or porch over a five year period in the early 2,000’s.

To apply for the permit, you will need to provide your local building inspector with detailed illustrations of your project and any additional required specifications related to materials. This includes:

  • The size and shape of the structure
  • Where the deck will be built in relation to your home;
  • Where the deck will be built in relation to your property lines;
  • The height of the deck from the ground;
  • The frost line and how the deck footings will be installed under grade;
  • Post and beam placement;
  • Redifooting documentation;
  • Type of soil;
  • The hardware and connectors you will use in your construction;
  • What material your deck will be built with;
  • On-center positioning of the joists;
  • Length, width, and thickness of wood or composite material;
  • Height and width of the railings and the spacing;

Prior to beginning your plan, you can save both time and trouble by meeting with the local building inspector prior to beginning the design or your deck. This way you’ll know what he or she requires from you prior to starting your initial design. Building inspectors from one city or town to the next have very different requirements and expectations.

What Tools Will You Need to Build Your Deck?

Of course, you can’t build a deck without the right tools! The good news is, a deck can be built with a fairly basic set of tools. And if you don’t own a lot of the tools listed below, you’ll find most to be fairly affordable. The power tools you may need, such as the mitre saw, power nailer, or a power auger can be rented.

  • Measuring tape (minimum of 25 feet or more)
  • Mitre saw (also called a “chop” saw)
  • Circular (hand) saw
  • Power drill and screwdriver combo (Note: be sure it’s a quality tool with enough power for lots of drilling and driving)
  • Carpenter’s level
  • Chalk line
  • Contractor’s pencil(s)
  • Framing Hammer
  • Screwdrivers (Slotted and Phillips head)
  • Palm sander
  • Hand or power auger (to dig holes for your RediFooting deck footing)
  • Spade shovel
  • Clamps (for various uses)
  • Power nailer and compressor

Building a deck yourself can be a rewarding and exciting experience. With proper planning, having or learning the right skills, and following a few simple steps before you begin your project, you can expect to have a completed project you’ll be proud of and will enjoy for many more years to come.

Written by · Categorized: deck building, deck planning

Footer

Fine Homebuilding shows how to build a shed using RediFooting for your shed project.  


Featured in Professional Deck Builder magazine as a featured alternative to concrete footings.
Home
About our Deck Footings
Privacy
Contact Us
Installation Instructions
Retail Locations
Become a dealer

Copyright © 2024 Premiere Plastic Products, Inc. · Foster, Rhode Island · 866-586-6082