• Skip to main content
  • Skip to footer

Redi-Footing

Easy Deck and Shed Footings

  • Home
  • Our Footings
  • Specs & Instructions
  • Order Now
  • Articles
  • FAQ’s
  • Contact Us

RediFooting

Sep 03 2024

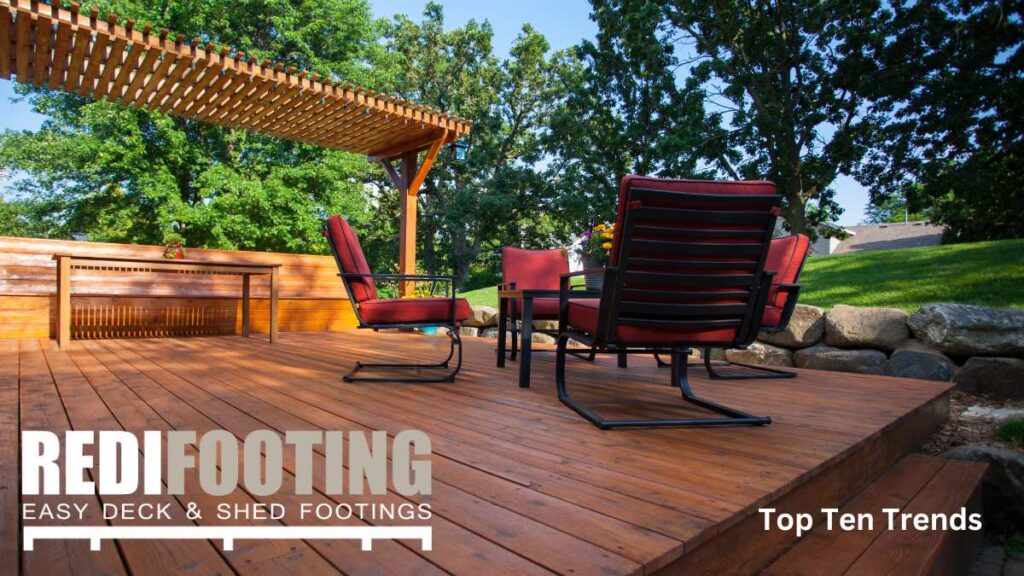
Top 10 Deck Design Trends

Top 10 Deck Design Trends

Decks have always been more than just an additional wood structure off the back of a house. As an extension of our indoor living spaces, a deck provides a seamless transition to the fresh air of the outdoors. New trends and building processes are shaping how decks are designed, built, and enjoyed. Whether you’re planning a new build or looking to update an existing deck, these top 10 trends will inspire you to create and enjoy your outdoor living space that’s both stylish and functional.

1. Multi-Level Decks

Decks don’t have to be confined to a single plane. Multi-level decks are gaining popularity, offering distinct areas for dining, lounging, and even gardening. These designs make the most of uneven terrain and can add a dynamic, architectural element to your outdoor space. Whether you have a sprawling yard or a more compact area, multi-level decks create visual interest and maximize the usability of your space.

2. Sustainable Materials

Sustainability continues to be a major influence in deck design. Homeowners are increasingly choosing eco-friendly materials like composite decking made from recycled wood fibers and plastics, or sustainably sourced natural wood like bamboo. These materials not only reduce environmental impact but also offer durability and low maintenance, making them a smart investment for the future.

3. Outdoor Kitchens and Dining Areas

As the trend of outdoor living continues, the demand for outdoor kitchens and dining spaces on decks is soaring. Expect to see fully equipped kitchens with grills, sinks, refrigerators, and even pizza ovens integrated into deck designs. Paired with comfortable dining furniture and weather-resistant cabinetry, these spaces are perfect for entertaining family and friends while enjoying the fresh air.

4. Mixed-Material Designs

Combining different materials is a trend that adds texture and visual appeal to decks. Think wood paired with metal, stone, or concrete elements. For example, you might see a wooden deck with metal railings, or a concrete seating area embedded into a wooden deck. This trend allows for creative expression and can make your deck stand out while blending harmoniously with the rest of your outdoor space.

5. Integrated Lighting

Lighting is no longer an afterthought in deck design. This year, integrated lighting is a key feature, enhancing both the functionality and ambiance of outdoor spaces. LED strip lights, recessed lighting, and solar-powered fixtures can be seamlessly incorporated into stairs, railings, and under-deck areas. These lights not only provide safety but also create a warm, inviting atmosphere for evening gatherings.

6. Minimalist Aesthetics

Clean lines, simple forms, and uncluttered spaces define the minimalist trend in deck design. Homeowners are opting for sleek, modern designs with a focus on functionality and elegance. This trend often features neutral color palettes, with natural wood tones or muted grays dominating the scene. The result is a sophisticated, timeless look that complements any home style.

7. Vertical Gardens and Green Walls

As outdoor spaces become more integrated with nature, vertical gardens and green walls are becoming popular additions to deck designs. These living walls not only add a lush, vibrant touch to your deck but also provide privacy and help reduce noise. They are perfect for small spaces where traditional gardening might not be feasible, offering a way to bring nature closer to your living area.

8. Built-In Seating and Storage

Efficiency and comfort are key in today’s deck design, with built-in seating and storage solutions leading the way. Benches with storage compartments, under-deck cabinets, and integrated planters are practical additions that help keep the deck clutter-free while providing ample seating for guests. These features are especially useful for smaller decks, where maximizing space is essential.

9. Fire Features

Fire features are set to be a hot trend this year, quite literally. Fire pits, fireplaces, and fire tables are becoming focal points on decks, providing warmth and ambiance for outdoor gatherings. These features can be fueled by wood, propane, or natural gas, and they add a cozy element to your deck, making it usable even on cooler nights. Whether you prefer a modern gas fireplace or a rustic wood-burning fire pit, there’s a fire feature to suit every style.

However, with the charm of fire comes the responsibility to ensure safety. When incorporating a fire feature on your deck, it’s crucial to follow safety guidelines to prevent accidents. Always ensure that your fire pit or fireplace is placed on a non-combustible surface, such as stone or concrete, and keep it a safe distance from any flammable materials like wood railings or furniture. Installing a fire-resistant barrier around the fire feature is also a good practice.

Proper ventilation is essential, especially for gas-fueled fire features, to prevent the buildup of dangerous fumes. Additionally, always have a fire extinguisher or a bucket of sand nearby, and never leave a fire unattended. By taking these precautions, you can enjoy the warmth and beauty of a fire feature while keeping your deck safe for everyone.

10. Smart Technology Integration

The rise of smart home technology is extending to outdoor spaces, with more homeowners incorporating tech features into their deck designs. From smart lighting systems that can be controlled via smartphone to weather sensors that protect outdoor furniture, technology is making decks more convenient and enjoyable. You can even install speakers, automated awnings, or misting systems to enhance your outdoor experience, all controlled with the touch of a button.

Conclusion

Deck design today is all about creating versatile, stylish, and functional outdoor spaces that enhance your lifestyle. Whether you’re drawn to the clean lines of minimalist aesthetics, the warmth of fire features, or the practicality of built-in seating, these trends offer something for every taste and budget. As you plan your deck, consider incorporating these ideas to create a space that’s not only beautiful but also perfectly suited to your needs.
Written by · Categorized: deck building, deck planning, Deck safety

Aug 28 2024

Deck Railings and Safety Features: Ensuring a Secure Outdoor Space

When it comes to building or renovating a deck, safety should be a top priority. While a well-constructed deck floor is essential, the railings and additional safety features play a crucial role in preventing accidents and ensuring your outdoor living space is secure for everyone. In this article, we’ll explore the importance of proper railings, discuss code-compliant construction techniques, and suggest additional safety enhancements to make your deck as safe as it is enjoyable.

The Necessity of Proper Railings and Safety Barriers

Deck railings serve multiple purposes. First and foremost, they provide a physical barrier to prevent falls, especially for children and pets. They also offer support for people as they move around the deck or climb stairs. Beyond safety, railings contribute to the overall aesthetic of your deck, enhancing its visual appeal and potentially increasing your home’s value.

Local building codes typically require railings for any deck that’s more than 30 inches above grade. However, even for lower decks, installing railings is a wise safety precaution. The height, spacing, and strength of deck railings are all regulated to ensure they can effectively prevent falls and withstand the force of someone leaning or falling against them.

Constructing Sturdy, Code-Compliant Railings

When building deck railings, it’s crucial to adhere to local building codes. While specific requirements may vary by location, here are some general guidelines for constructing code-compliant railings:

1. Height: Most codes require a minimum railing height of 36 inches for residential decks. For decks on higher floors or commercial properties, the minimum height may increase to 42 inches.

2. Spacing: The gaps between balusters (the vertical posts or spindles) should not exceed 4 inches. This requirement is designed to prevent small children from slipping through or getting stuck.

3. Strength: Railings must be able to withstand a certain amount of force. Typically, they should resist a 200-pound load applied in any direction.

4. Graspability: Handrails, especially on stairs, should be easy to grip. Most codes require a graspable circumference between 4 and 6.25 inches.

To construct sturdy, code-compliant railings:

1. Start with a solid foundation: Secure posts to the deck frame, not just to the deck boards. Use sturdy 4×4 or 6×6 posts, depending on the height and design of your railing.

2. Space posts properly: Install posts no more than 6 feet apart to ensure the railing’s strength.

3. Use appropriate fasteners: Employ through-bolts or lag screws to attach posts to the deck frame. For added strength, use blocking between joists where posts are attached.

4. Install a sturdy top rail: Choose a design that’s both attractive and functional. Ensure it’s securely fastened to the posts.

5. Add balusters: Install balusters, ensuring they’re spaced no more than 4 inches apart. They can be made of wood, metal, glass, or composite materials, depending on your preference and local code requirements.

6. Don’t forget the bottom rail: A bottom rail adds strength to the entire railing system and provides a finished look.

7. Consider cable or glass panel options: These modern alternatives can provide unobstructed views while still meeting safety requirements. Always check local codes for specific regulations regarding these materials.

Additional Safety Enhancements

While proper railings are essential, there are several other safety features you can incorporate into your deck design:

1. Stair Treads: Ensure your deck stairs are safe by using slip-resistant treads. These can be made of composite materials with textured surfaces or can be added to existing wood stairs. Proper tread depth (typically a minimum of 10 inches) and consistent riser height are crucial for safe navigation.

2. Lighting: Adequate lighting is essential for safety, especially for evening use. Consider these lighting options:

   – Post cap lights: These provide ambient lighting and mark the perimeter of your deck.

   – Stair lights: Install lights on stair risers or along the sides of steps to illuminate the path.

   – Rail lights: Low-voltage lights can be incorporated into or under handrails for a subtle glow.

   – Overhead lighting: For larger decks, consider overhead fixtures or string lights for overall illumination.

3. Gate Latches: If your deck is elevated, installing a self-closing, self-latching gate at the top of the stairs can prevent children or pets from accessing the stairs unsupervised.

4. Non-Slip Surfaces: Apply non-slip coatings or use textured deck boards to reduce the risk of slips and falls, especially in areas that may get wet.

5. Regular Inspections: While not a physical feature, implementing a routine inspection schedule is crucial for maintaining your deck’s safety. Check for loose boards, protruding nails, and signs of wear or rot regularly.

6. Clear Pathways: Ensure your deck layout provides clear pathways for movement. Avoid placing furniture or planters too close to railings or stairs.

7. Fire Safety: If you have a grill or fire pit on your deck, ensure proper clearance from railings and the house. Consider installing a fire-resistant mat underneath.

8. Weather Protection: In areas prone to high winds, hurricane straps or other reinforcements may be necessary to secure the deck to your home’s structure.

Accessibility Considerations

When designing your deck and its safety features, consider accessibility for all potential users:

1. Ramps: For homes with occupants who use wheelchairs or have mobility issues, a ramp can provide easier access to the deck.

2. Wider Gates: If installing gates, ensure they’re wide enough to accommodate wheelchairs or walkers.

3. Contrasting Colors: Use contrasting colors for stair edges or level changes to make them more visible for those with visual impairments.

Conclusion

A well-designed deck with proper railings and safety features not only meets legal requirements but also provides peace of mind for homeowners and their guests. By prioritizing safety in your deck design and construction, you create an outdoor living space that’s both beautiful and secure. Remember, while these guidelines provide a good starting point, always consult your local building codes and consider hiring a professional to ensure your deck meets all safety standards. With the right precautions in place, your deck can be a safe haven for relaxation and enjoyment for years to come.


Disclaimer:

The information provided in this article is for general informational purposes only. While we strive to offer accurate and up-to-date guidance, building codes and safety standards can vary by location and may change over time. This content should not be considered a substitute for professional advice. Always consult with local building authorities, certified contractors, or licensed architects to ensure your deck project complies with current regulations and safety standards in your area. The authors and publishers of this article are not responsible for any actions taken based on the information provided herein.

Written by · Categorized: deck building, deck building material, deck planning, Deck safety, Uncategorized

Aug 27 2024

Essential Tools and Equipment for Building a Deck or Shed

With the right gear, you can work efficiently, ensure accurate results, and avoid unnecessary setbacks.

Building a deck or shed can be an exciting DIY project that adds value to your home and creates functional outdoor space. But before you begin construction, having the right tools and equipment is crucial for ensuring the project goes smoothly. With the right gear, you can work efficiently, ensure accurate results, and avoid unnecessary setbacks. Whether you’re a seasoned DIYer or a first-time builder, this guide will walk you through the essential tools and equipment you need to get the job done right.

1. Measuring and Layout Tools

Accurate measurements are the foundation of any construction project. Before any wood is cut or holes are dug, ensure you have these essential measuring and layout tools:

  • Tape Measure: A high-quality 25-50 foot tape measure will be your best friend during the project. It’s essential for measuring lumber, setting post distances, and ensuring all dimensions are correct.
  • Speed Square: For marking straight lines, making precise angles, and ensuring square corners, a speed square is an invaluable tool.
  • Chalk Line: A chalk line helps mark long straight lines on large surfaces, ensuring accurate board placement and cutting.
  • Level: A four-foot level is perfect for making sure your posts, boards, and framing are perfectly level and plumb. Smaller torpedo levels can help with tighter spaces.
  • Laser Level: If you want to take your measurements to the next level, a laser level will project level lines over longer distances, ensuring everything stays aligned throughout the project.

2. Cutting Tools

Once everything is measured and laid out, you’ll need cutting tools to prepare the materials.

  • Circular Saw: A circular saw is an absolute must for cutting lumber to length. With its versatility and power, this tool can handle most of the cutting needs during deck or shed construction.
  • Miter Saw: For precise angled cuts, such as for framing or decking boards, a miter saw is an excellent addition to your toolkit.
  • Jigsaw: If your project includes curves or custom shapes, a jigsaw will give you the precision you need for more intricate cuts.
  • Hand Saw: While power tools do the heavy lifting, having a sharp hand saw on hand for quick cuts or finishing up a job can be incredibly useful.

3. Digging and Foundation Tools

A solid foundation is key to ensuring the longevity of your deck or shed. Here’s what you’ll need to get the foundation in place:

  • Post Hole Digger: Whether you’re building on concrete footings or using post supports, you’ll need a post hole digger or auger to dig deep holes for your foundation.
  • Shovel: Even with a post hole digger, a sturdy shovel will help with clearing dirt and leveling the ground where your deck or shed will be built.
  • Tamper: To ensure the ground is level and compact, a tamper can compress the soil and create a sturdy base for your footings.
  • Concrete Tools: If you’re pouring concrete footings, you’ll need a wheelbarrow, a mixing tool or drill, and a trowel to spread and level the concrete.

4. Fastening and Assembly Tools

You’ll need to secure your materials together, so make sure you have the following fastening tools:

  • Drill/Driver: A powerful cordless drill or impact driver is crucial for drilling pilot holes, driving screws, and attaching hardware. Make sure you have a variety of drill bits and driver bits to accommodate different screw sizes.
  • Hammer: A sturdy hammer is essential for driving nails and other fasteners into place.
  • Nail Gun: If you’re working on a larger deck or shed, a framing nailer or finish nailer can make the process of nailing boards much faster and easier.
  • Screws and Nails: You’ll need plenty of outdoor-grade screws and nails, especially galvanized or stainless steel to prevent rusting. Be sure to have a variety of sizes for different tasks.

5. Safety Equipment

Don’t overlook safety gear when working on a construction project. Proper protection can prevent injuries and help you work with peace of mind.

  • Safety Glasses: When cutting wood, using power tools, or working with fasteners, always wear safety glasses to protect your eyes from flying debris.
  • Hearing Protection: Power tools can get loud. Protect your hearing with earplugs or earmuffs, especially during prolonged use of saws and drills.
  • Gloves: Work gloves will protect your hands from splinters, cuts, and other injuries while handling materials.
  • Dust Mask or Respirator: When cutting wood or working with concrete, wearing a dust mask or respirator will help protect your lungs from inhaling harmful dust particles.

6. Finishing Tools

Once the deck or shed is assembled, finishing tools will help you put the final touches on the project.

  • Sanders: A power sander can smooth rough edges on wood and prepare the surface for painting or staining. An orbital sander is often preferred for large areas, while a detail sander can work on tight spaces.
  • Paint Brushes and Rollers: If you’re painting or staining your deck or shed, having a variety of brushes and rollers on hand will help you achieve a smooth, even finish.
  • Caulking Gun: A caulking gun can help seal any gaps between boards, joints, or around windows and doors in a shed, preventing water from seeping in.

7. Specialty Equipment

Depending on the specific deck or shed you’re building, you may also need some specialty tools or equipment.

  • Pry Bar: A pry bar is useful for demolition work or adjusting and removing boards during installation.
  • Clamps: When assembling frames or aligning boards, having a few clamps on hand can help hold everything securely in place while you work.
  • Ladder: If you’re building a raised deck or constructing a tall shed, a sturdy ladder will allow you to reach higher areas safely.

Conclusion

Building a deck or shed requires the right combination of planning, skill, and tools. Having these essential tools and equipment on hand will not only help you complete the project efficiently but also ensure it’s built to last. While some tools may be more specialized, the investment is worthwhile, as they can be reused for future projects. Before starting your build, take inventory of your tools, gather everything you need, and prioritize safety at every step. With the right preparation, your deck or shed will be a success that enhances your outdoor space for years to come.

Written by · Categorized: deck building, deck building material, deck planning, Deck safety

Aug 22 2024

The Role of Footings in Preventing Deck and Shed Rot and Damage

When building a deck or shed, the materials used, the design chosen, and the overall craftsmanship are crucial. However, one often overlooked aspect that plays a critical role in the longevity and durability of these structures is the footings. Proper footings are essential in preventing rot and damage, ensuring that your deck or shed remains safe, sturdy, and free from moisture-related issues for years to come.

Understanding the Importance of Footings

Footings are the foundational elements that support the weight of a structure and transfer it to the ground. They create a stable base, preventing the structure from sinking or shifting over time. More importantly, footings keep the wood framing and other materials above ground, protecting them from direct contact with soil and moisture.

Moisture is one of the leading causes of rot in wooden structures. When wood remains in contact with wet ground or is exposed to constant moisture, it becomes susceptible to fungal growth, which leads to decay. Over time, this can compromise the structural integrity of your deck or shed, resulting in costly repairs or even complete rebuilds.

How Footings Protect Against Moisture

By elevating the structure off the ground, footings create a barrier between the wood and the soil. This gap allows air to circulate, helping to keep the wood dry and reducing the risk of moisture buildup. Additionally, proper footings direct water away from the structure, preventing pooling and minimizing the chances of water seeping into the wood.

For decks, this is particularly important in areas where the ground is often wet or prone to flooding. In such conditions, poorly designed footings can lead to waterlogging, where water accumulates around the base of the deck posts. This water can eventually seep into the wood, leading to rot and weakening the entire structure. Properly installed footings help ensure that water is drained away, keeping the deck posts dry and secure.

The Role of Footings in Preventing Shed Damage

Sheds, like decks, are also vulnerable to moisture-related damage. Because sheds are often used to store tools, equipment, and other valuable items, it’s crucial to protect them from the elements. Without adequate footings, sheds can shift or settle unevenly over time, leading to structural issues such as warping or cracking. Moreover, sheds that are in direct contact with the ground are at greater risk of water damage, especially during heavy rain or snowmelt.

Footings elevate the shed, providing a stable and level base that prevents moisture from seeping into the floor and walls. This is particularly important if the shed is built in an area with poor drainage or if the soil retains moisture. Proper footings can also help prevent pests, such as termites, from infesting the shed by creating a barrier that keeps the structure out of direct contact with the ground.

Choosing the Right Footings for Your Project

When it comes to selecting footings for your deck or shed, there are several options available, including concrete, piers, and pre-made footings like RediFooting. Each option has its own benefits and drawbacks, but the key is to choose a footing that provides adequate support and protection for your specific project.

Concrete footings have traditionally been the go-to choice for many builders, but they come with challenges. Mixing and pouring concrete can be labor-intensive, requiring significant time and effort. In addition, concrete footings must cure for several days before construction can continue, potentially delaying your project.

Pre-made footings, like RediFooting, offer a convenient and effective alternative to concrete. These footings are designed to provide the same level of support and protection as concrete, but with a simpler installation process. RediFootings are made from durable plastic materials that are resistant to moisture, making them an ideal choice for preventing rot and damage. They also eliminate the need for mixing and pouring concrete, saving you time and effort during installation.

Installation Tips for Optimal Protection

To maximize the benefits of your footings and ensure long-lasting protection against rot and damage, it’s important to follow best practices during installation:

  1. Proper Depth: Footings should be installed at a depth that is below the frost line to prevent shifting during freeze-thaw cycles. This also ensures that the footing is stable and provides consistent support for the structure.
  2. Adequate Drainage: Ensure that the area around the footings has proper drainage to prevent water from pooling. Consider adding gravel or a drainage system around the base to help direct water away from the structure.
  3. Leveling: Make sure that all footings are level before beginning construction. Uneven footings can lead to an unstable structure and increase the risk of damage over time.
  4. Use the Right Materials: Choose materials that are suitable for your climate and soil conditions. For example, if you’re building in an area with heavy rainfall, opt for materials that are resistant to water damage.

Proper footings are an essential component of any deck or shed project, providing the necessary support to keep the structure safe and secure. By preventing direct contact with the ground, footings protect against moisture-related issues such as rot and damage. Whether you choose traditional concrete footings or opt for a modern solution like RediFooting, investing in quality footings will pay off in the long run by ensuring the longevity and durability of your deck or shed. Remember, the foundation of your project is just as important as the design and materials you choose—so don’t overlook the importance of proper footings in protecting your investment.

Written by · Categorized: Uncategorized

Aug 15 2024

How to Build a Deck or Shed on a Budget Cost-Saving Tips and Tricks

Cost-Saving Tips and Tricks

Building a deck or shed can be a rewarding project, but it can also put a strain on your wallet if you’re not careful. However, with some strategic planning and smart choices, it’s entirely possible to build your dream outdoor structure without breaking the bank. Here are some essential tips and tricks for keeping costs down without sacrificing quality.

1. Plan and Budget Carefully

The first step to any successful project is proper planning. Before you start building, take the time to sketch out your design and create a detailed budget. This will help you determine exactly how much material you’ll need, what tools are required, and where you can cut costs without compromising the integrity of the build.

Use online calculators and free design tools to visualize your deck or shed and determine the size and scope of the project. Keeping your design simple and straightforward will save on materials and labor. A well-thought-out plan also minimizes the risk of costly mistakes and rework down the line.

2. Choose Affordable Materials Without Sacrificing Durability

When building on a budget, it’s essential to find a balance between cost and durability. Pressure-treated lumber is a great option for deck framing and shed construction, as it’s relatively inexpensive and resistant to rot and insects. Composite materials, while more expensive initially, offer long-term savings due to their durability and low maintenance.

For sheds, consider using plywood or oriented strand board (OSB) for walls and roofing. These materials are less expensive than traditional lumber but still provide strong, reliable protection from the elements. You can also save by opting for simple gravel or concrete pavers as a foundation for your shed instead of pouring a full concrete slab.

3. Save on Footings with RediFooting

One of the most labor-intensive and costly aspects of building a deck or shed is setting the footings. Traditional concrete footings require a significant investment of both time and money. Each footing hole can require up to five bags of cement, totaling around 350 pounds of concrete per hole. Not only does this add up quickly in material costs (around $50-$60 per hole), but it also means heavy lifting and hours of labor mixing and pouring concrete.

Then, after pouring the concrete, your project is on hold for two to three days while you wait for it to cure, assuming the weather cooperates. And if you’re a professional builder, you already know your valuable time would be better spent elsewhere.

4. Reuse and Recycle Materials

Another great way to save money is by reusing materials you may already have on hand or sourcing recycled materials from other projects. Check local salvage yards, Craigslist, or Facebook Marketplace for leftover decking boards, framing lumber, or even windows and doors for your shed. Reclaimed wood can also add a rustic, charming aesthetic to your deck or shed at a fraction of the cost of new materials.

Reusing materials not only cuts costs but also reduces waste, making your project more eco-friendly. Just be sure to inspect any used materials carefully to ensure they are still in good condition and suitable for use in your build.

5. Do It Yourself, but Know When to Call in a Pro

One of the most significant cost-saving strategies when building a deck or shed is doing the work yourself. Labor costs can account for a large portion of the total project budget, so taking on the job as a DIY project can save you hundreds or even thousands of dollars.

However, it’s essential to know your limitations. If the project requires complex tasks like electrical work, advanced carpentry, or plumbing, it may be worth hiring a professional to handle those aspects of the build. Mistakes in these areas can lead to expensive repairs and safety hazards down the line, so it’s better to invest in a pro when needed.

6. Buy Materials in Bulk

If your deck or shed project requires a large amount of lumber, screws, or other building materials, consider buying in bulk to save money. Many suppliers offer discounts for bulk purchases, and buying everything at once can reduce trips to the store, saving both time and gas money.

You can also check for sales at your local home improvement store or even online suppliers. Seasonal sales, end-of-line products, and bulk packages can all offer significant savings if you plan your project accordingly.

7. Opt for Simple Designs

The more elaborate the design, the more it will cost in both materials and labor. While it’s tempting to include features like multiple levels, built-in seating, or fancy railings, keeping your design simple will keep costs down. A straightforward rectangular deck or shed can still be beautiful and functional, especially with the right choice of materials and finishes.

If you’re set on incorporating custom features, consider adding them later when your budget allows. Building in stages can spread out costs and make the project more affordable in the long run.

8. Finish It Yourself

Once the main construction is complete, there’s no need to hire a professional to finish your deck or shed. Staining, painting, and sealing are tasks that are easy to do on your own with a little patience. By handling the finishing touches yourself, you can save on labor costs and put your personal stamp on the project.

Be sure to choose high-quality finishes that will protect your deck or shed from the elements and prolong the life of the structure. While premium finishes might cost more upfront, they will save you money over time by reducing the need for frequent maintenance and repairs.

Conclusion

Building a deck or shed on a budget is entirely possible with the right strategies in place. By planning carefully, choosing affordable materials, saving time and money with innovative products like RediFooting, and doing as much of the work yourself as possible, you can create a durable, attractive outdoor space without breaking the bank. Focus on quality where it matters most, and you’ll enjoy the results of your labor for years to come.

Written by · Categorized: deck building, deck building material, deck planning, Deck safety

  • « Go to Previous Page
  • Page 1
  • Page 2

Footer

Fine Homebuilding shows how to build a shed using RediFooting for your shed project.  


Featured in Professional Deck Builder magazine as a featured alternative to concrete footings.
Home
About our Deck Footings
Privacy
Contact Us
Installation Instructions
Retail Locations
Become a dealer

Copyright © 2025 Premiere Plastic Products, Inc. · Foster, Rhode Island · 866-586-6082